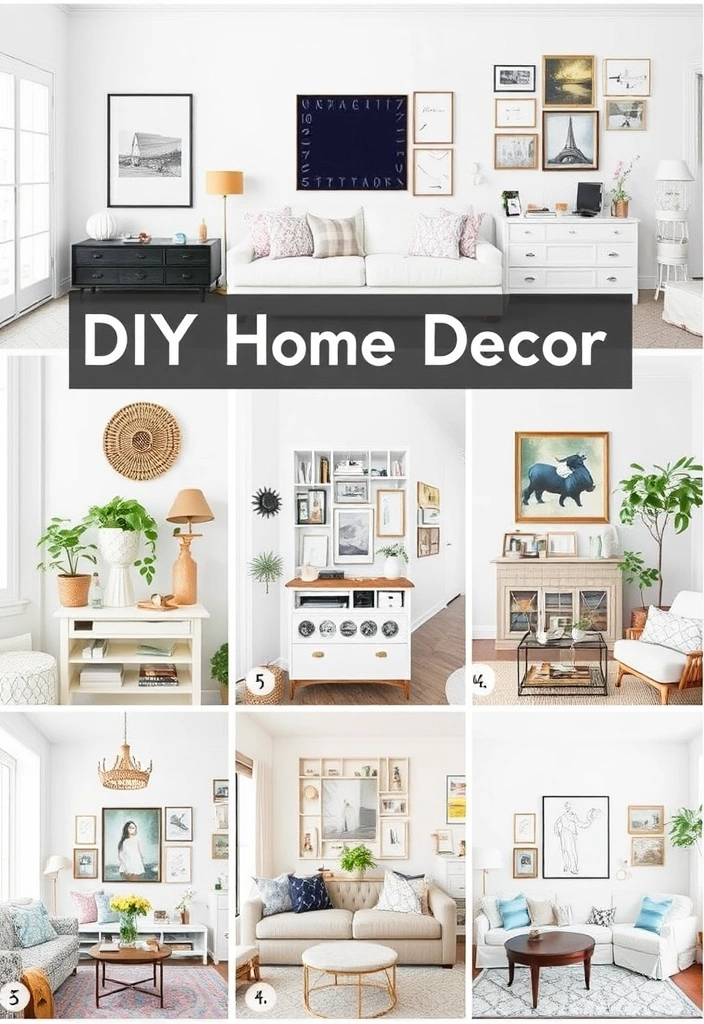
Looking to breathe new life into your living space without emptying your wallet?
This list of 25 DIY home decor projects will inspire you to create stunning transformations that reflect your personal style.
Whether you’re a seasoned DIY enthusiast or a beginner, these affordable and creative ideas will help you elevate your home’s aesthetic with minimal fuss.
DIY Wall Art with Fabric Scraps
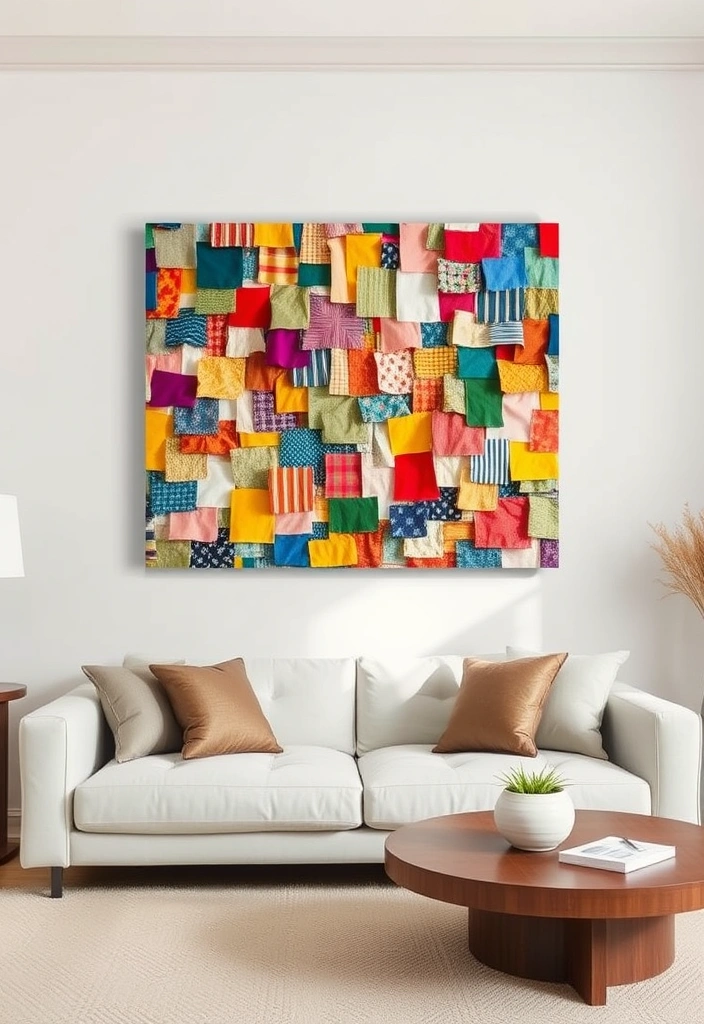
Creating stunning wall art using fabric scraps is not just a fun and affordable way to enhance your home decor; it’s also a fantastic opportunity to express your creativity and give new life to leftover materials. This project allows you to add unique texture and color to your space without spending a fortune.
To start, gather your fabric scraps. These can come from old clothing, leftover sewing projects, or even thrift store finds. Look for a variety of patterns, colors, and textures to create visual interest. The beauty of using fabric is that it brings a tactile element to your wall art that traditional prints or paintings simply can’t match.
Next, select a canvas or a wooden board as your base. The size can vary depending on how much space you want to fill and the impact you want to create. A larger piece can serve as a stunning focal point, while smaller pieces can be grouped together for a more eclectic look.
Once you’ve chosen your base, it’s time to arrange your fabric scraps. Lay them out without adhering them first, allowing yourself to experiment with different patterns and color combinations. Play with layering, overlapping pieces, and varying the orientation of the fabrics to find a design that resonates with you. Don’t be afraid to mix and match prints; bold contrasts can create a striking visual effect.
When you’re satisfied with your layout, start attaching the fabric to your canvas or board. Fabric glue works well for this project, as it provides a strong bond and is easy to use. You may also consider using a staple gun for heavier materials or if you want a more secure hold.
After securing the fabric, take a moment to trim any excess edges if needed, and let your creation dry completely. To add an extra touch of depth, consider embellishing your wall art with additional elements like buttons, beads, or even small wooden shapes. These details can elevate your piece and make it truly one-of-a-kind.
Finally, hang your fabric wall art in a prominent spot, and watch as it transforms your space. Whether it’s in your living room, bedroom, or even a hallway, this DIY decor project is sure to bring warmth and personality to your home.
By utilizing fabric scraps, you’re not only creating a beautiful piece of art but also adopting an eco-friendly approach to home decor. This fun and creative project is perfect for anyone looking to add a personal touch to their space while keeping costs down. So gather your materials, let your imagination run wild, and create a stunning wall art piece that reflects your unique style!
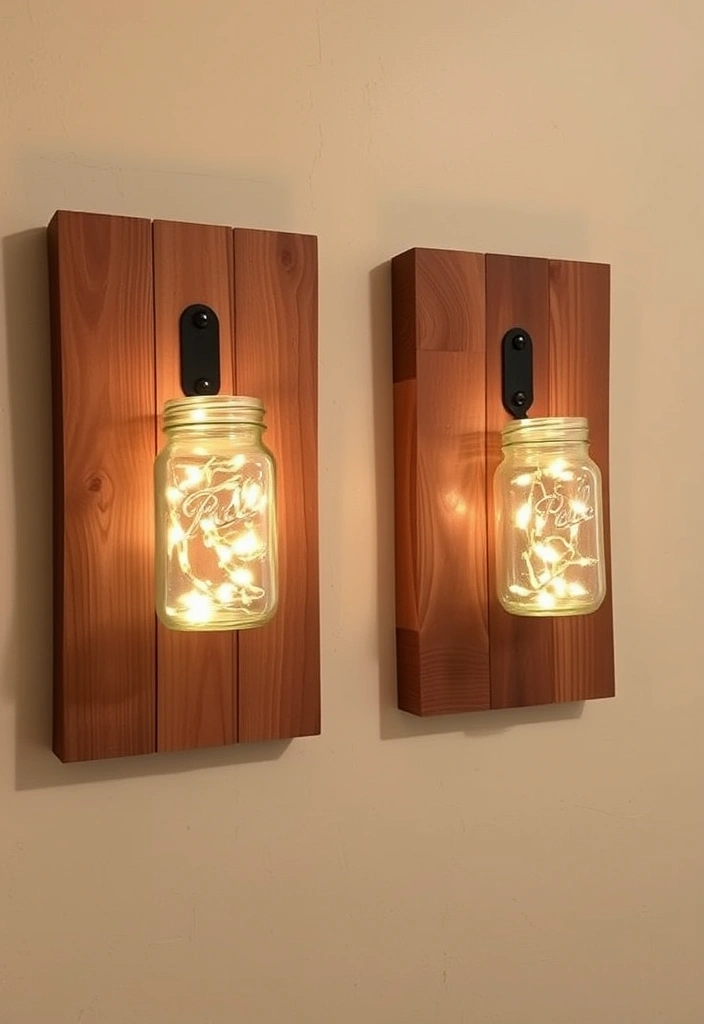
Mason Jar Sconces
Mason Jar Sconces
If you’re looking to add a touch of rustic charm to your home decor, mason jar sconces might just be the perfect project for you. These delightful accents not only enhance your walls but also provide a warm ambiance that transforms any space into a cozy retreat.
To create your own mason jar sconces, start by selecting wooden boards that will serve as the base. You can choose reclaimed wood for an authentic farmhouse feel or opt for a sleek finish that suits a more modern aesthetic. The beauty of this DIY decor project lies in its versatility; you can paint the wood to match your existing color scheme or leave it natural for a more organic look.
Once your boards are ready, securely attach mason jars to them. This step allows for a myriad of creative possibilities. Fill the jars with twinkling fairy lights to create a magical glow that’s perfect for evening gatherings or intimate dinners. Alternatively, fresh flowers can be arranged inside for a vibrant, living decoration that brings a breath of fresh air into your home.
Not only are these sconces affordable, but they also allow for personalization. You can tailor your arrangement based on the seasons, switching out flowers or lights to reflect holidays or your own mood. For a more eclectic design, mix different sizes of jars or combine them with other decorative elements like greenery or candles.
These mason jar sconces are an ideal DIY home project that anyone can tackle, whether you’re a seasoned crafter or just starting out. They add a unique touch to your decor while being functional, as they can serve as both decorative pieces and practical lighting options. So gather your supplies and let your creativity shine—your walls will thank you!
Repurposed Wooden Pallet Coffee Table
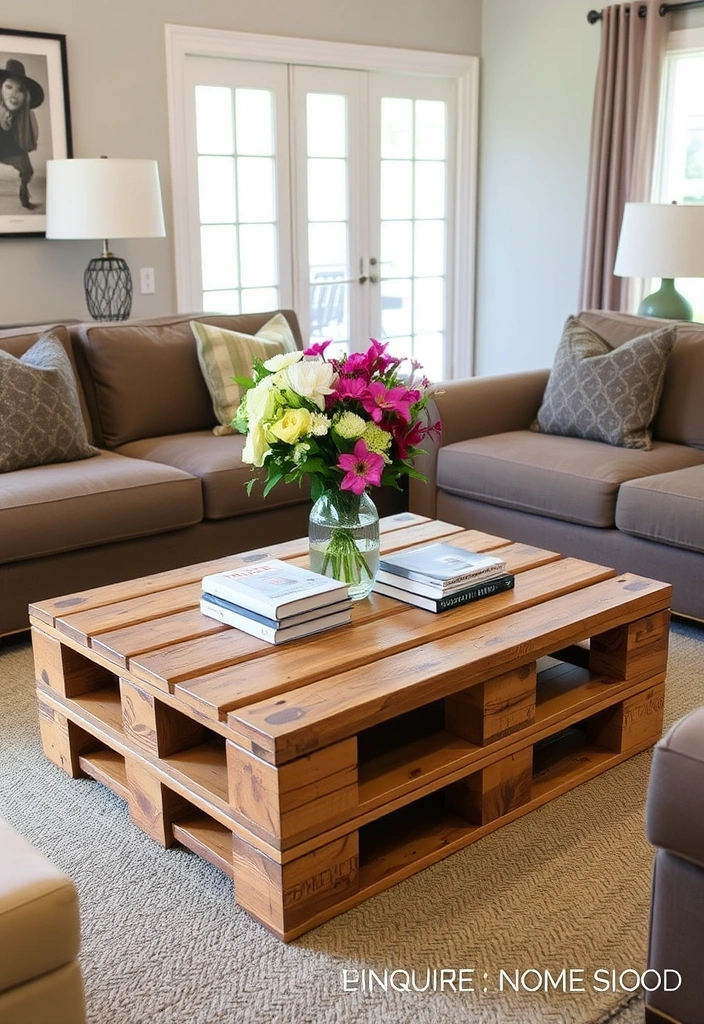
Transform your living room with a stunning coffee table crafted from repurposed wooden pallets! This DIY decor project not only adds a rustic charm to your space but also allows you to express your creativity while keeping costs low.
Start by sourcing your wooden pallets—check local businesses, online marketplaces, or even your neighborhood. Once you have your pallets, give them a good sanding to achieve a smooth finish, ensuring there are no rough edges that could snag clothing or scratch surfaces. This step is crucial for both aesthetics and safety, so take your time!
Next, stack the pallets to create a unique table structure that suits your style and space. You can experiment with different arrangements; perhaps you prefer a simple two-pallet stack or a more complex design with additional layers. As you stack, make sure to secure everything tightly using screws or brackets for durability. This not only enhances the table’s stability but also adds an industrial flair to the overall design.
Once your structure is complete, it’s time to unleash your creativity! Whether you opt for a bold paint color that makes a statement or a rich stain that highlights the wood’s natural beauty, the choice is entirely yours. Consider adding patterns or textures with stencils or decoupage for an even more personalized touch. This is where your DIY decor truly shines—there are no limits to what you can create!
To finish off your coffee table, consider adding a protective clear coat. This will not only enhance the color and finish but also protect your masterpiece from everyday wear and tear.
Get ready to impress your guests with this affordable and stylish addition to your home! Your repurposed wooden pallet coffee table will undoubtedly become a conversation starter, showcasing your creativity and resourcefulness while transforming your living room into a warm and inviting space.
Fabric-Covered Bulletin Board
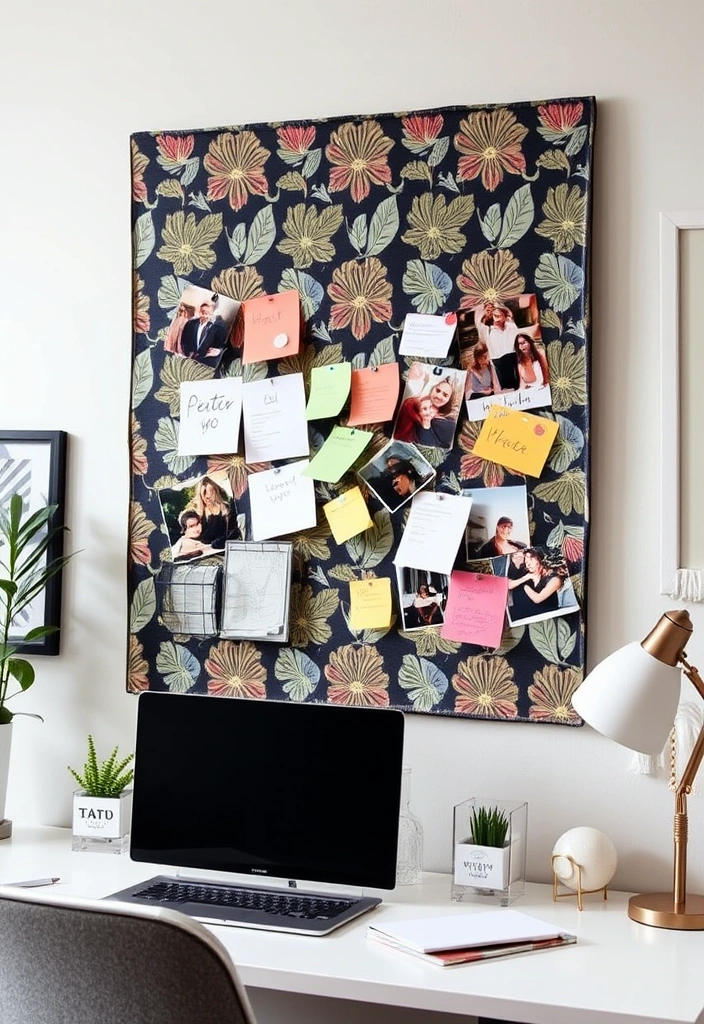
Transforming a plain corkboard into a fabric-covered bulletin board is a rewarding DIY decor project that marries functionality with flair. Not only will this addition help you keep your space organized, but it will also infuse your home with personality and color.
Start by selecting a vibrant fabric that speaks to your style. Whether you prefer bold patterns or soft pastels, the fabric you choose can significantly affect the overall look of your bulletin board. Consider using a fabric that complements the existing decor in your room, creating a cohesive aesthetic.
Once you have your fabric, gather your materials. You’ll need a plain corkboard, fabric, a staple gun or strong adhesive, scissors, and a ruler. Begin by measuring the corkboard and cutting the fabric to size, allowing for some extra material to wrap around the edges.
Next, lay the fabric face down on a clean surface and place the corkboard on top. Pull the fabric tightly over the edges of the corkboard and secure it in place with your staple gun, making sure to keep the fabric taut for a smooth finish. If you’re using adhesive, apply it carefully to avoid any wrinkles.
After securing the fabric at the back, trim any excess fabric, and voilà! You now have a chic, customized bulletin board that will serve as both an organizational tool and a decorative piece.
Hang your new creation in a prominent spot, whether it’s in your home office, kitchen, or hallway. Use it to pin up important notes, reminders, or even inspiring quotes that motivate you throughout your day.
This fabric-covered bulletin board project is not only affordable but also a creative way to express your personal style while keeping your space neat. So gather your materials and get crafting—your walls will thank you!
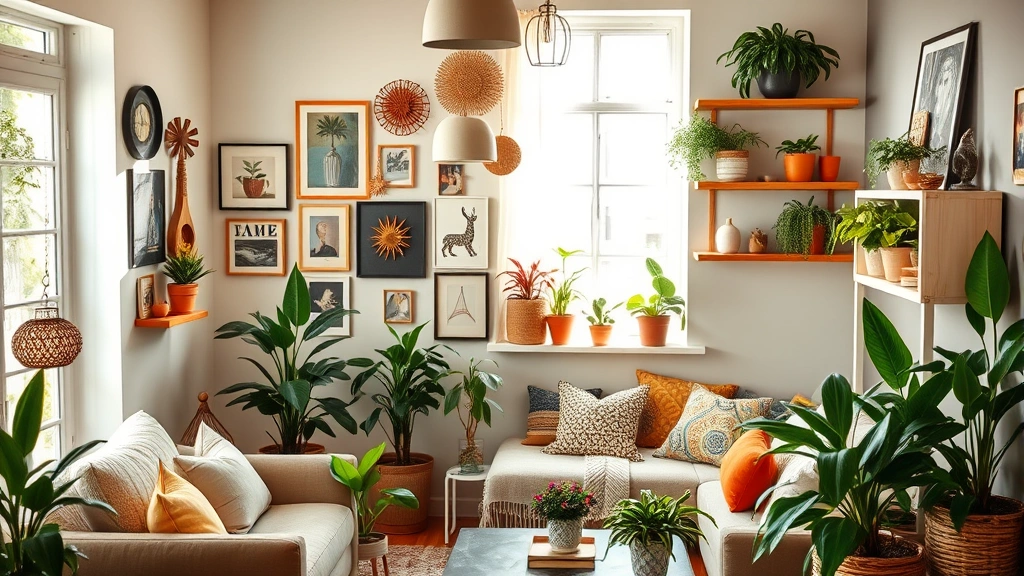
DIY Photo Collage Wall

Creating a DIY photo collage wall is a heartfelt way to infuse your personal style into your living space. Not only does it allow you to showcase your favorite memories, but it also transforms empty walls into vibrant storytelling canvases that reflect who you are.
Start by gathering a collection of photos that resonate with you. These can be snapshots from memorable vacations, candid moments with loved ones, or even artistic shots that inspire you. The beauty of this project lies in its versatility; there are no strict rules about what kinds of images to include. Choose photos that evoke happiness or nostalgia, as these will be the pieces that bring warmth to your home.
Once you have your collection, consider how you want to frame them. Mixing and matching frames in assorted styles, colors, and materials can add dimension and character to your collage. You might opt for sleek modern frames paired with vintage finds or even go frame-less with a series of printed photos mounted directly on the wall. The key is to create a cohesive look that feels uniquely yours.
When it comes to arranging your photos, lay them out on the floor first to experiment with different configurations before committing to the wall. Consider creating a grid pattern for a clean, organized look, or go for a more organic arrangement that flows across the wall. Don’t be afraid to include other elements like artwork, mirrors, or decorative objects to enhance your collage and make it even more visually engaging.
Once you’ve settled on an arrangement, it’s time to hang your frames. Use picture-hanging strips for a damage-free option, or traditional hooks for a more secure fit. Ensure that you step back frequently to see how the arrangement looks from a distance, making adjustments as needed until everything feels just right.
The finished collage not only serves as a stunning visual display but also acts as a beautiful conversation starter for guests. Each photo carries a story, inviting friends and family to share in your memories and experiences.
Incorporating a DIY photo collage wall into your home decor is an affordable and creative way to personalize your space. It’s an opportunity to celebrate your journey, capture fleeting moments, and create an inviting atmosphere that reflects your unique personality. So gather those cherished photos and let your walls tell your story!
DIY Geometric Wall Stencil
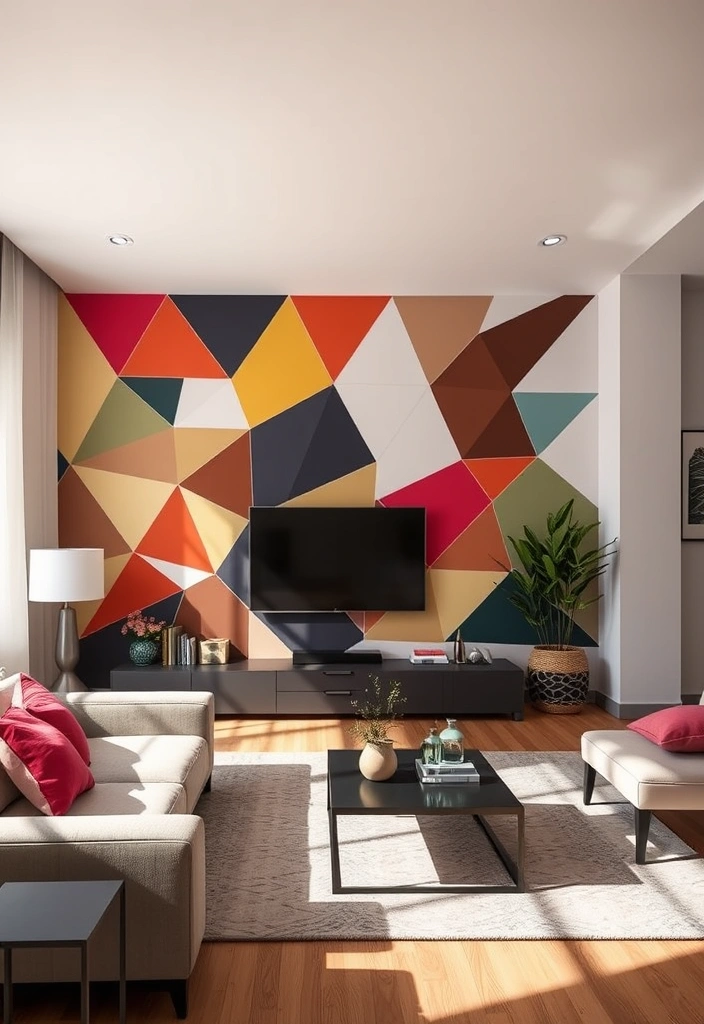
Transforming your walls with geometric stencils is a fantastic way to inject personality into your living space. Not only does this project allow for creativity, but it also offers a striking visual impact that can elevate the overall aesthetic of any room.
To get started, gather your materials: painter’s tape, a selection of paint colors that complement your existing decor, a paintbrush or roller, and your imagination. Begin by deciding on the shapes you want to incorporate—triangles, hexagons, or even a mix of various forms can create an intriguing pattern.
Use the painter’s tape to outline your desired shapes on the wall. The tape acts as a guide, ensuring clean lines and a professional finish. Don’t be afraid to experiment with different sizes and orientations to achieve a dynamic look. Once you’re satisfied with the arrangement, it’s time to fill in the shapes with paint. A bold color can make a statement, while softer hues offer a more subtle approach.
Allow the paint to dry thoroughly before carefully peeling away the tape to reveal your stunning geometric design. The transformation is immediate and impactful, offering a fresh and modern touch to your space.
This DIY decor project is perfect for those who want to make a statement without committing to a full repaint. It’s an affordable way to refresh your walls while showcasing your personal style. Whether you choose to tackle one accent wall or go all out and decorate multiple surfaces, the result is sure to be a conversation starter.
Embrace your creative side and watch as your walls come to life with this simple yet effective DIY home project.
Upcycled Glass Bottle Vases
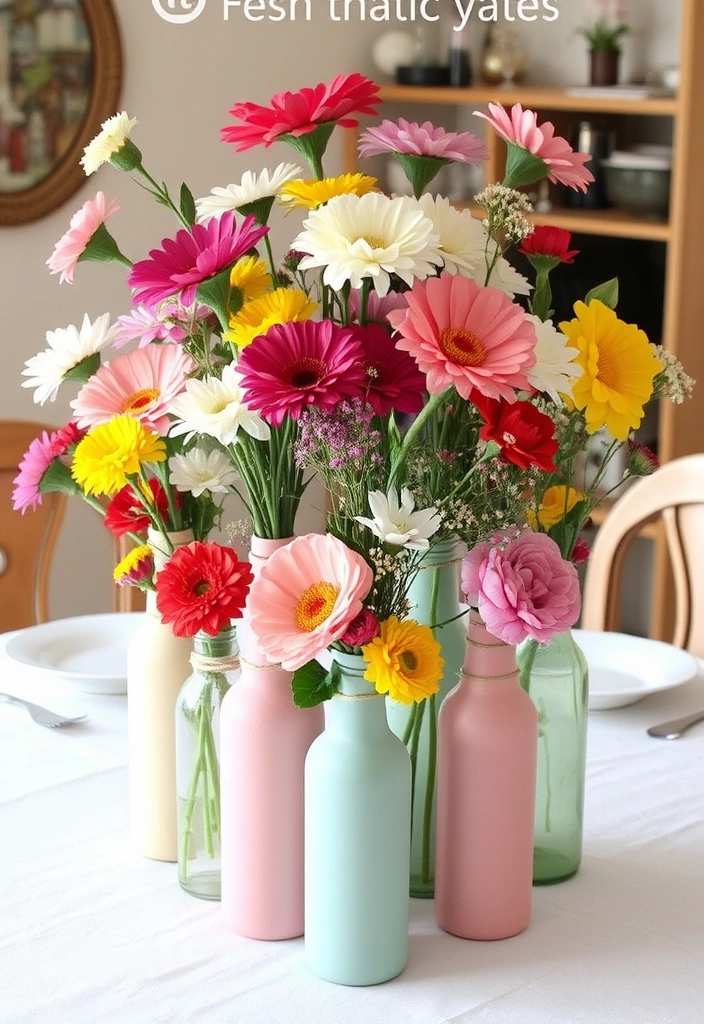
Upcycled Glass Bottle Vases
Transforming empty glass bottles into stunning vases is a fantastic way to inject creativity into your home decor while keeping things affordable. This DIY decor project not only allows you to express your artistic side but also contributes to a more sustainable lifestyle by repurposing items that might otherwise end up in the trash.
To start, gather various glass bottles—think wine bottles, mason jars, or even unique soda bottles. The first step is to give them a thorough cleaning. Remove any labels and residue; a little soap and warm water usually do the trick. If you want to take your vases to the next level, consider painting them. Choose colors that complement your existing decor, or go for bold, bright hues to make a statement. If you prefer a more minimalist look, leaving them clear can add a touch of elegance to your space.
Once your bottles are cleaned and painted (if you choose to paint them), it’s time to fill them! Fresh flowers are an obvious choice, but don’t overlook the beauty of branches or twigs. A single, tall branch can create a striking focal piece, while a cluster of wildflowers can bring a cheerful vibe to your room. You can also experiment with dried flowers or even seasonal decor, allowing your vases to evolve with the time of year.
Arranging these vases throughout your home can instantly elevate the ambiance. Place them on your dining table, use them as a centerpiece for your coffee table, or line them along a windowsill to bring a bit of nature indoors.
Not only do these upcycled glass bottle vases serve as beautiful decor, but they also tell a story—each bottle has its own history and character. By incorporating this DIY decor project into your home, you’re not just beautifying your space; you’re also making a conscious effort to be environmentally friendly.
So, gather your empty glass bottles and let your imagination run wild. This creative project is an excellent way to refresh your home without breaking the bank, allowing you to showcase your unique style while making a positive impact on the planet.
DIY Woven Wall Hanging
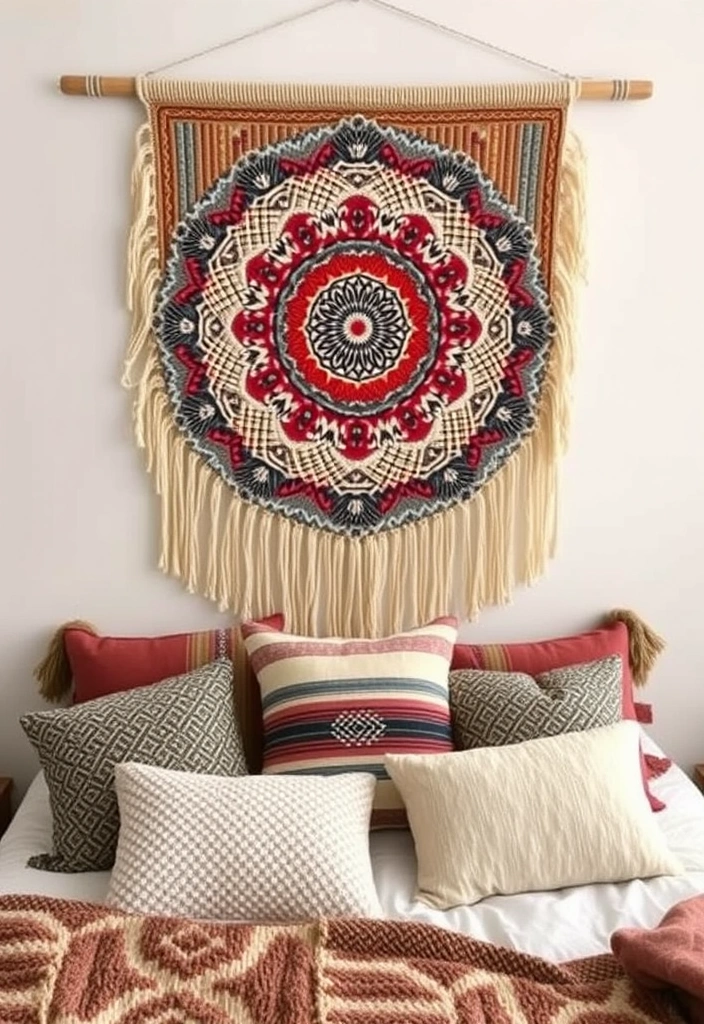
Creating a cozy atmosphere in your home doesn’t have to come with a hefty price tag. One of the most delightful ways to add warmth and personality to your space is through a DIY woven wall hanging. Not only does it introduce texture and color into your decor, but it also serves as a reflection of your artistic flair.
To get started, you don’t need to invest in fancy equipment. A simple loom can be a fantastic tool, but if you’re feeling adventurous, your hands can do the trick just as well. Gather an assortment of colorful yarns that speak to your style—think rich earth tones, vibrant hues, or soft pastels. Whatever palette you choose, ensure it complements the existing decor of your room.
As you begin weaving, consider incorporating various techniques to create depth and interest. Mixing different yarn thicknesses can add layers, while playing with knotting or looping can introduce unique patterns. Don’t be afraid to let your creativity take the lead; this is your chance to design something truly one-of-a-kind.
Once your wall hanging is complete, find the perfect spot to display it. Whether it’s over a cozy reading nook, above your bed, or as a statement piece in your living room, the right placement can transform the entire ambiance of the space.
This DIY decor project not only enhances your home but also provides a therapeutic crafting experience. Engaging with your hands and expressing your creativity can be incredibly fulfilling, making this an affordable way to refresh your environment.
So, gather your supplies, unleash your imagination, and create a beautiful woven wall hanging that will elevate your home’s decor while keeping your budget intact.
DIY Vintage Suitcase Table
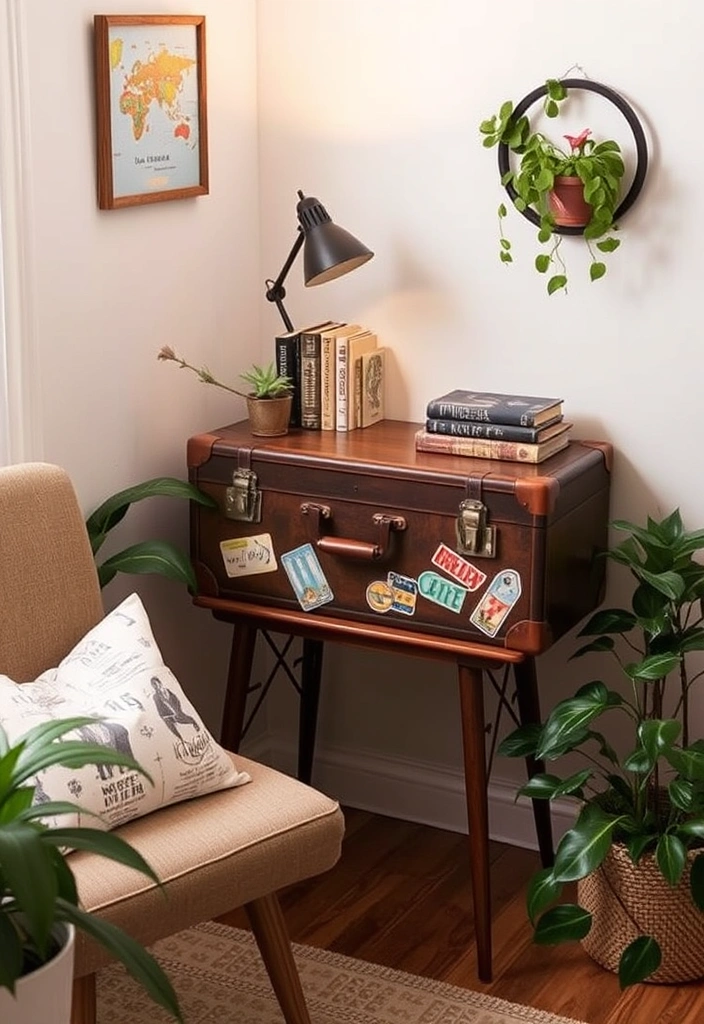
DIY Vintage Suitcase Table
Adding a touch of vintage charm to your home can be both fun and affordable, and what better way to do this than by creating a DIY suitcase table? This creative project not only serves a practical purpose but also brings a story and a unique flair to your living space.
To get started, search for an old suitcase at thrift stores, flea markets, or even in the depths of your garage. Look for one with a bit of character—perhaps it has worn leather, colorful patterns, or even travel stickers that hint at journeys taken long ago. The beauty of these suitcases lies in their history, and they can often spark conversations among guests.
Once you’ve found the perfect suitcase, it’s time to attach some legs. You can purchase pre-made table legs from a craft store or repurpose old furniture legs for a more eclectic look. Simply secure the legs to the corners of the suitcase using screws and brackets, ensuring they are sturdy enough to support the weight of items you may place on top.
This DIY decor piece is particularly perfect for small spaces, as it doesn’t take up much room while still providing functionality. Use it as a stylish side table next to your sofa, a bedside table in your bedroom, or even as a unique plant stand. The suitcase can also serve as hidden storage for blankets, books, or other items you want to keep out of sight but still within reach.
Not only will this project enhance the character of your living area, but it also allows you to express your creativity and personality. There’s something incredibly satisfying about transforming an overlooked object into a functional piece of art that reflects your style. Plus, it’s a wonderful way to incorporate sustainable practices into your home decor by giving new life to an item that might otherwise end up in a landfill.
Incorporating a DIY vintage suitcase table into your home decor is an affordable way to make a statement and showcase your creativity. So gather your materials, roll up your sleeves, and let your imagination take the lead as you craft a piece that is as practical as it is charming.
DIY Reclaimed Wood Wall Art
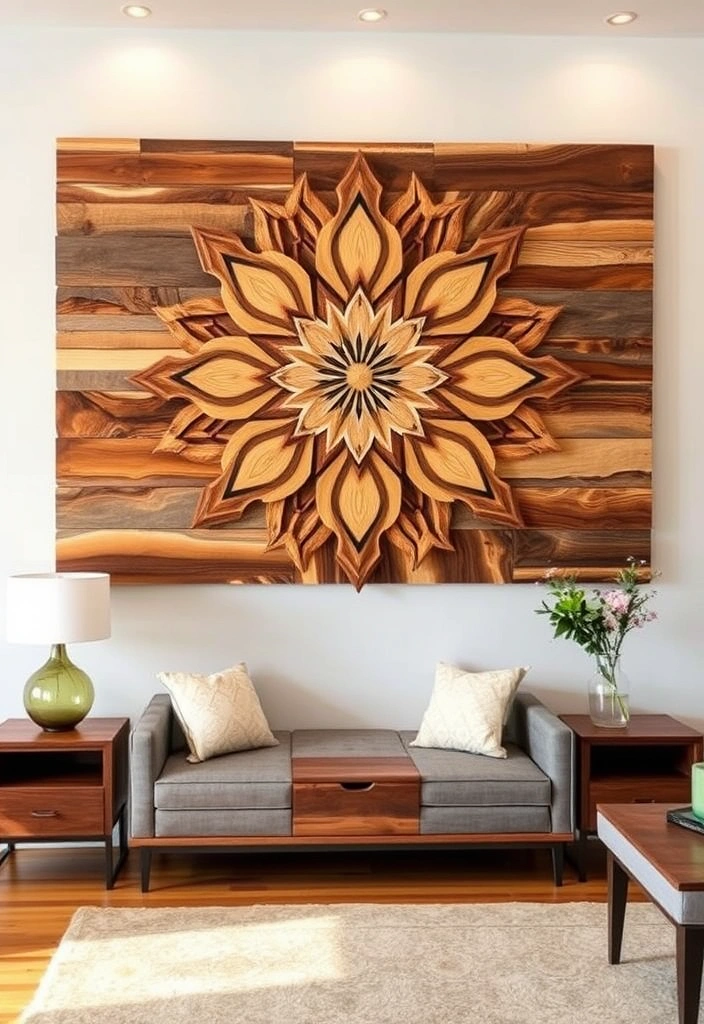
Creating wall art from reclaimed wood is an excellent way to infuse your home with character and warmth while championing sustainable practices. Not only is this project budget-friendly, but it also offers an opportunity to showcase your creativity and personal style.
Start by gathering wooden planks from local salvage yards, construction sites, or even your own backyard. Each piece tells a story, with its unique texture and patina reflecting its past life. Clean and prep the wood to ensure it’s ready for your artistic vision. Depending on your preference, you can leave the wood in its natural state, highlighting its rustic charm, or apply a coat of paint for a splash of color.
Consider arranging the planks in geometric shapes, herringbone patterns, or even a more abstract design that speaks to your aesthetic. Experiment with different sizes and orientations to create visual interest. Adding a personal touch, such as stenciling a quote or image onto the wood, can elevate your piece and make it truly one-of-a-kind.
To hang your creation, use appropriate hardware that can support the weight of the wood while ensuring easy installation. Once mounted, your reclaimed wood wall art will not only serve as a focal point in the room but also as a conversation starter, showcasing your commitment to eco-friendly living.
This DIY decor project is perfect for anyone looking to add a unique touch to their home without spending a fortune. By embracing the beauty of reclaimed materials, you can create a warm and inviting atmosphere that reflects your values and personality. Whether you’re a seasoned DIYer or just starting, this project is an affordable and rewarding way to transform your space.
DIY Decorative Trays
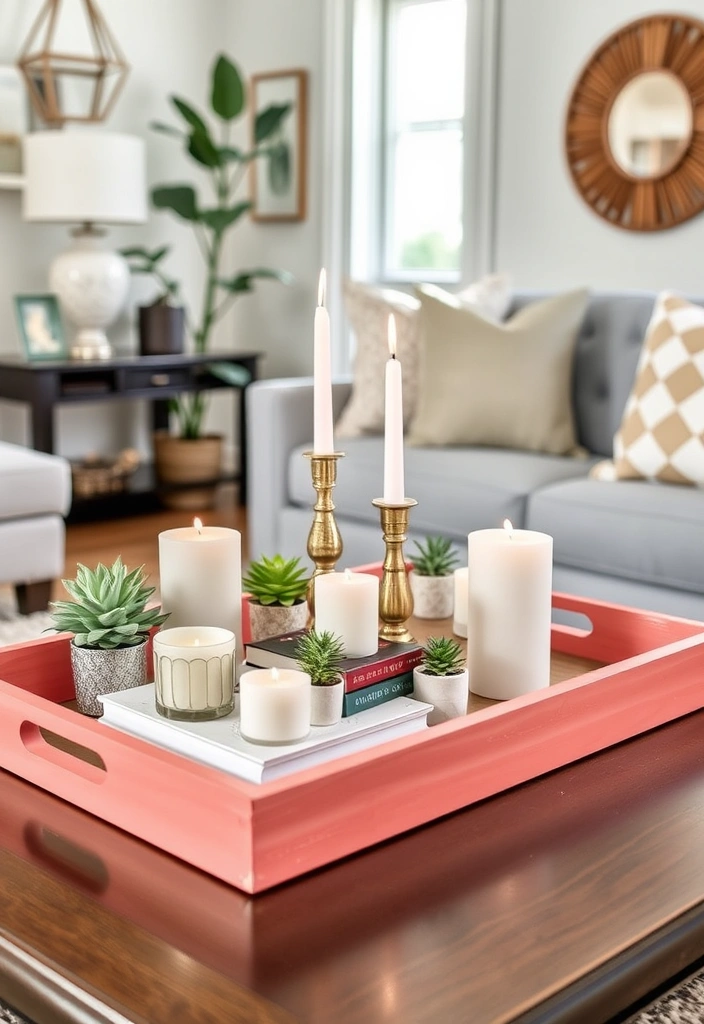
DIY Decorative Trays
Transforming your space can be both fun and affordable, especially when you take on the project of creating chic decorative trays. These versatile items not only help you organize your essentials but also serve as stylish accents in your home. With just a few materials and a bit of creativity, you can craft unique trays that reflect your personal style.
Start by selecting a wooden or metal tray as your base. You can find these materials at thrift stores, craft shops, or even online marketplaces, making them an affordable choice for your DIY decor project. The beauty of using trays lies in their adaptability—the design possibilities are endless!
Once you have your tray, consider customizing it. Painting is a straightforward way to add a splash of color. Choose hues that complement your existing decor or go for bold shades to make a statement. If you’re feeling particularly artistic, you could even create patterns or designs using painter’s tape as a guide.
For those who enjoy a more intricate approach, decoupage is a fabulous option. Find some beautiful patterned paper or fabric that resonates with your aesthetic. Cut out shapes or images and adhere them to the tray using a decoupage medium. Finish with a clear sealant to protect your design and give it a polished look.
Stencils are another creative avenue to explore. You can use stencils to add quotes, designs, or even seasonal motifs that can be changed out as the year progresses. This method allows for a personal touch, making your trays not just functional, but also a reflection of your tastes.
Once your trays are complete, the possibilities for their use are endless. They can hold your keys by the front door, showcase candles on a coffee table, or even organize your makeup vanity. Their practicality makes them invaluable, while their custom designs ensure that they enhance the beauty of your home.
By creating your own decorative trays, you’re not only saving money but also engaging in a fulfilling DIY home project that brings a touch of your personality into your space. So gather your materials, unleash your creativity, and watch as your space transforms with these chic, functional additions.
DIY Candle Holders from Clay
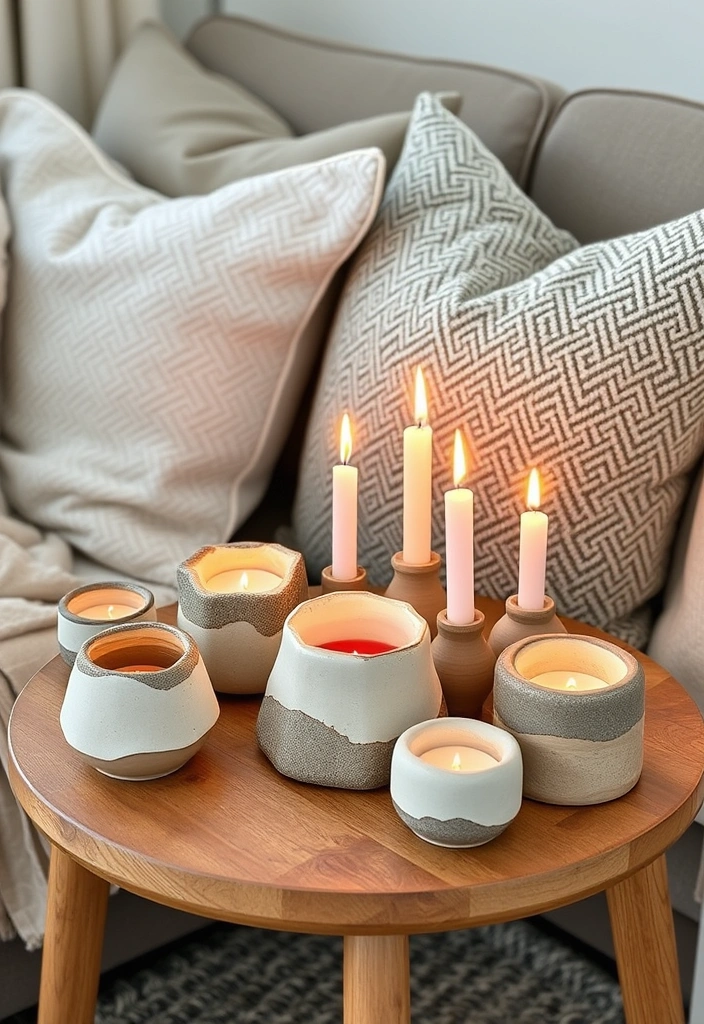
Creating your own candle holders from air-dry clay is a delightful and rewarding DIY decor project that can breathe new life into your living space. This affordable craft allows you to express your creativity while adding a personal touch to your home.
Start by gathering your materials. You’ll need air-dry clay, a clean work surface, and a few basic tools like a rolling pin, knife, and molds for shaping. The beauty of air-dry clay is its versatility; you can easily shape it into various designs, from sleek and modern to whimsical and organic.
Begin by kneading the clay to make it pliable, and then roll it out to your desired thickness. Use cookie cutters or your hands to create unique shapes. If you’re feeling adventurous, try sculpting intricate patterns or textures directly into the clay. You might even consider making a set of holders in different shapes and sizes for an eclectic look.
Once you have molded your candle holders, allow them to dry completely. This usually takes about 24 hours, but it’s best to check the manufacturer’s instructions for specific drying times. Once dry, you can choose to leave them in their natural clay state for a minimalist aesthetic, or you can unleash your creativity by painting them.
A coat of matte or glossy paint can change the entire vibe of your candle holders. Consider using neutral tones for a calm and serene look, or vibrant colors to make a statement. For an extra touch, you could add embellishments like metallic accents or stencils.
These handmade candle holders not only serve as beautiful decor items but also create a warm and inviting atmosphere in any room. Place them on your dining table, mantel, or bedside table, and light a candle inside to enjoy the soft glow that enhances the coziness of your space.
Ultimately, these DIY candle holders are more than just functional pieces; they are a reflection of your artistic flair and a wonderful way to personalize your home without breaking the bank. Whether you’re a seasoned crafter or a beginner, this project is a fantastic opportunity to unleash your creativity and enjoy the satisfaction of making something beautiful with your own hands.
DIY Seasonal Wreaths
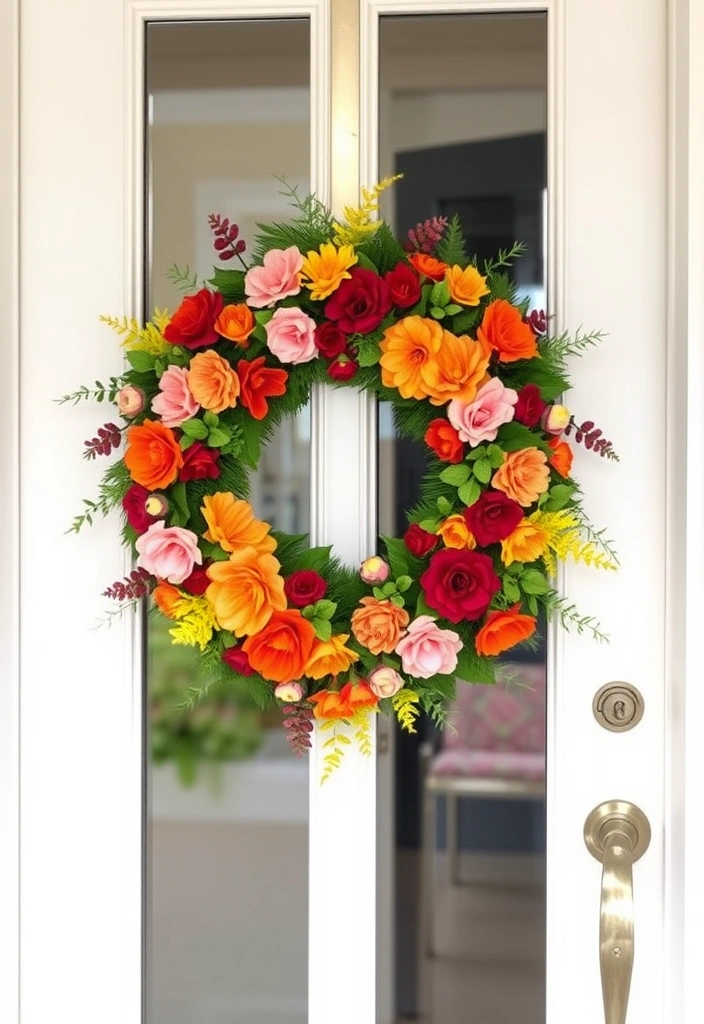
Embrace the beauty of each season by crafting your very own DIY seasonal wreath. This delightful project not only brightens up your home but also offers a wonderful opportunity to express your creativity through various materials.
In spring, consider using fresh flowers, greenery, and even colorful ribbons to create a vibrant and lively wreath. The soft pastels and bold blooms of the season can reflect the renewal and freshness that spring brings.
As summer rolls around, think about incorporating elements like seashells, driftwood, or bright faux flowers to capture the essence of sunny days and beach getaways. A wreath adorned with sunflowers or tropical leaves can instantly bring a warm and inviting look to your door.
When autumn arrives, it’s time to celebrate the rich colors of the season. Gather natural materials like pinecones, acorns, and dried leaves to craft a rustic wreath that embodies the essence of fall. You can also use warm-toned faux flowers, like marigolds or dahlias, to add a touch of seasonal charm.
As winter approaches, let your creativity shine by designing a wreath that reflects the coziness of the season. Incorporate evergreen branches, berries, or even ornaments for a festive touch. A wreath adorned with faux snow and twinkling lights can create a warm welcome for friends and family during the holidays.
This DIY decor project is not only affordable, but it also allows you to personalize your home decor to match each season. Whether you’re using natural materials, faux flowers, or even colorful paper, the possibilities are endless.
Each wreath you create can tell a story and reflect your unique style, making your front door or wall a stunning focal point. So gather your materials, unleash your creativity, and enjoy the process of bringing seasonal joy into your home with these beautiful wreaths.
DIY Desk Organizer
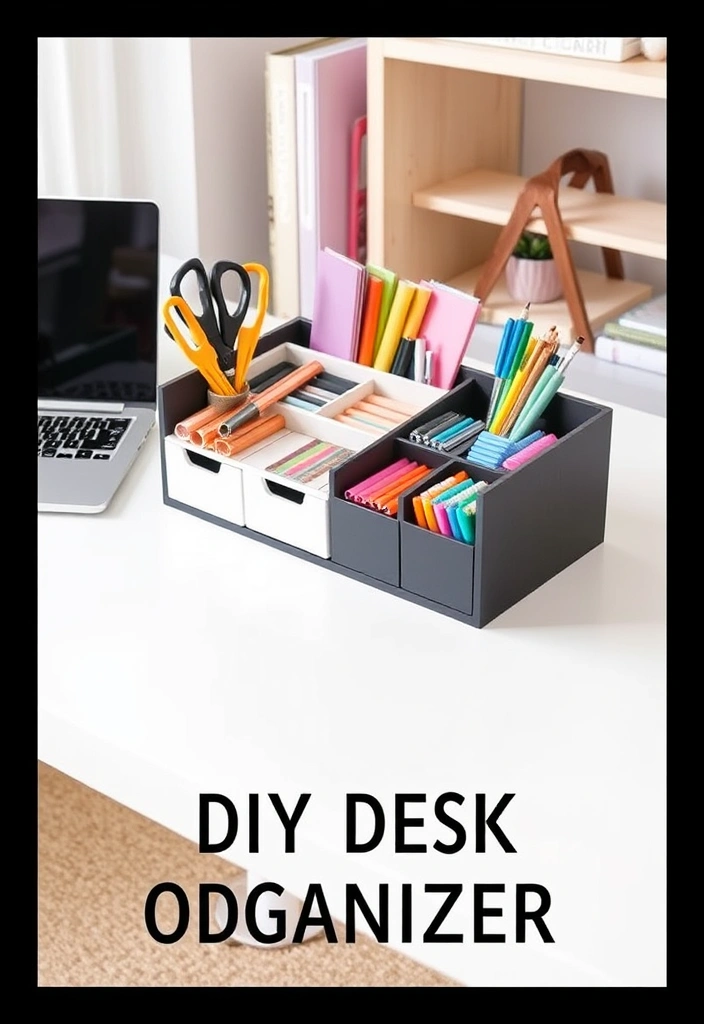
Creating a DIY desk organizer is a fantastic way to infuse your workspace with some personal flair while keeping it neat and functional. A clutter-free desk is not only visually appealing but also enhances productivity, making it easier to focus on the tasks at hand. Plus, with a little creativity and some basic materials, you can craft a stylish organizer that reflects your personality.
To start, gather materials that you likely already have around the house. Cardboard is a versatile option; you can repurpose old boxes or packaging to cut out compartments of various sizes. If you have some wood scraps lying around, consider using them to build a more durable and rustic organizer. For an even simpler solution, empty tin cans can be transformed with some paint or decorative paper, providing a charming and eclectic touch to your desk.
As you design your organizer, think about your specific needs. Do you have a plethora of pens and markers? Create larger compartments for them. If paper clips and sticky notes are your go-to supplies, carve out smaller sections to keep everything within arm’s reach. Experiment with different shapes and sizes, and don’t hesitate to mix materials for a unique look.
Once you have your compartments ready, it’s time to add some personal touches. Paint your cardboard or wood in colors that inspire you or match your existing decor. For a more rustic vibe, consider using natural wood finishes or even decoupage techniques to apply paper or fabric patterns that resonate with your style.
Incorporating decorative elements like washi tape, stickers, or even a small plant can elevate your DIY desk organizer from functional to fabulous. A little attention to aesthetics not only beautifies your workspace but can also motivate you throughout your day.
This DIY decor project is not just about organizing; it’s about creating a space that feels truly yours. An organized desk reduces stress and distractions, making it a perfect backdrop for creativity. Plus, it’s an affordable way to engage in a hands-on project that adds character to your home office or study area.
So, roll up your sleeves and let your imagination run wild. With just a few materials and a sprinkle of creativity, you can transform your workspace into a tidy, stylish haven that inspires you every day.
DIY Seasonal Table Centerpieces
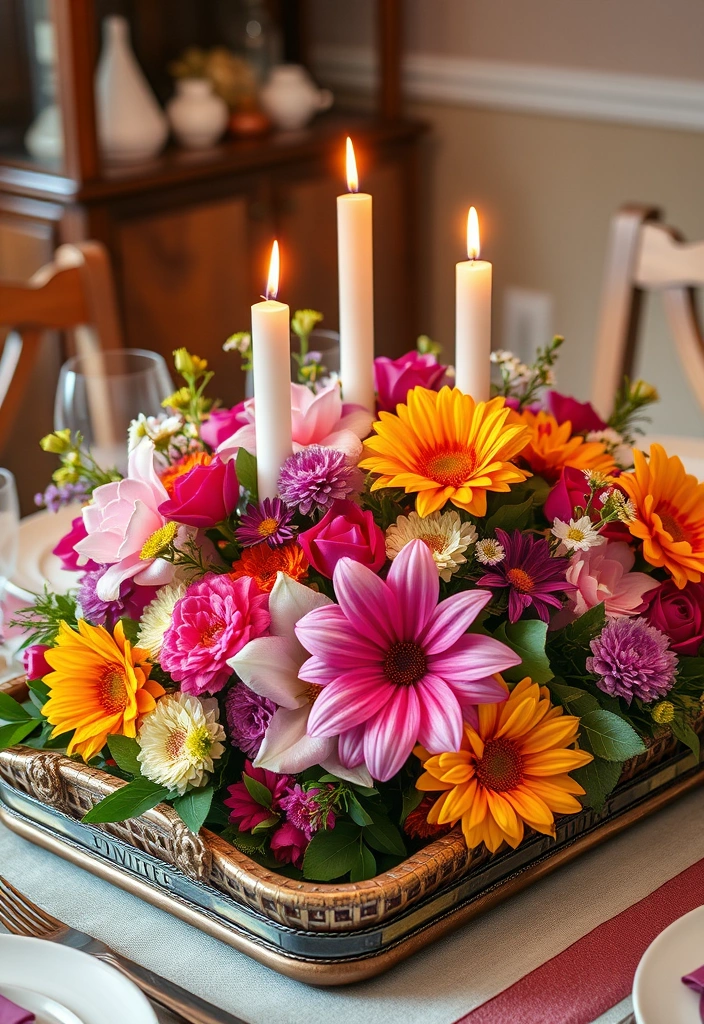
Transforming your dining table into a seasonal spectacle can be both a rewarding and budget-friendly endeavor. With just a few natural materials, flowers, and candles, you can create stunning table centerpieces that not only impress your guests but also elevate your overall dining experience.
For spring, think about incorporating fresh blooms. Gather a mixture of colorful flowers such as tulips, daffodils, and daisies. You can arrange these in a simple glass vase or even in a rustic wooden box for a more farmhouse feel. Surround the vase with green moss or small pebbles to add texture and a natural touch. To enhance the ambiance, include a few tealight candles tucked among the flowers. The gentle glow will create a warm atmosphere perfect for any gathering.
As summer rolls in, consider a vibrant centerpiece filled with seasonal fruits. Use a decorative bowl or a woven basket to display bright oranges, lemons, and limes. This not only adds a pop of color but also infuses your dining area with a refreshing scent. To take it a step further, you can add sprigs of fresh mint or basil for an aromatic touch. Pair this centerpiece with a few floating candles in a shallow bowl of water for a delightful evening vibe.
When autumn arrives, it’s time to embrace the rich hues of the season. Collect small pumpkins, gourds, and acorns to create a rustic display. Arrange these elements on a wooden tray or a large platter. You can even incorporate dried corn or wheat stalks to enhance the fall theme. Adding some candles in varying heights will create a cozy, inviting atmosphere perfect for chilly evenings.
Finally, as winter approaches, consider a more elegant look with a centerpiece featuring evergreen branches, pinecones, and berries. A glass cloche can beautifully showcase these elements while adding a sophisticated touch. You might also incorporate metallic elements, such as gold or silver candles, to bring in some sparkle during the holiday season.
Each seasonal centerpiece not only reflects the beauty of its time but also allows you to engage in an affordable and creative DIY decor project. By utilizing natural materials and simple arrangements, you can refresh your dining space effortlessly throughout the year. Your guests will be impressed, and you’ll enjoy the satisfaction of crafting something personal and beautiful for your home.
DIY Wall-Mounted Planters

Transforming your space doesn’t have to come with a hefty price tag. One of the most affordable and creative ways to bring life into your home is through DIY wall-mounted planters. This project not only adds a splash of greenery but also maximizes your space, making it perfect for small apartments or homes with limited floor area.
To get started, gather some wooden boxes or repurposed materials like old crates or pallets. These can often be found at local thrift stores, flea markets, or even in your garage. If you’re feeling adventurous, you can even use items like tin cans or glass jars for a more eclectic look. The beauty of DIY decor lies in the versatility of the materials you can use.
Once you have your planters ready, it’s time to give them a little personality. Sand down any rough edges, paint them in vibrant colors, or leave them with a natural finish for a rustic feel. Adding hooks, rope, or even fabric can enhance the design while ensuring that your planters remain secure on the wall.
When it comes to mounting, choose a wall that receives enough sunlight for your plants to thrive. Use sturdy brackets or wall anchors to ensure that your planters can hold the weight of the soil and plants without any risk of falling.
Now for the fun part: selecting the plants! Opt for low-maintenance varieties like succulents, herbs, or trailing vines that can cascade beautifully from your planters. Not only will these plants add greenery, but they can also enhance the air quality in your home.
Arranging the planters in a pattern that suits your style can create a stunning focal point. Whether you choose a symmetrical layout or a more casual, staggered arrangement, the visual impact will be significant.
Incorporating these DIY wall-mounted planters into your home decor is a simple yet effective way to bring the outdoors inside. They add freshness, create a unique aesthetic, and make a statement without costing a fortune. Plus, every time you look at them, you’ll be reminded of the creativity and effort you put into making your space truly yours.
DIY Knitted or Crocheted Throws
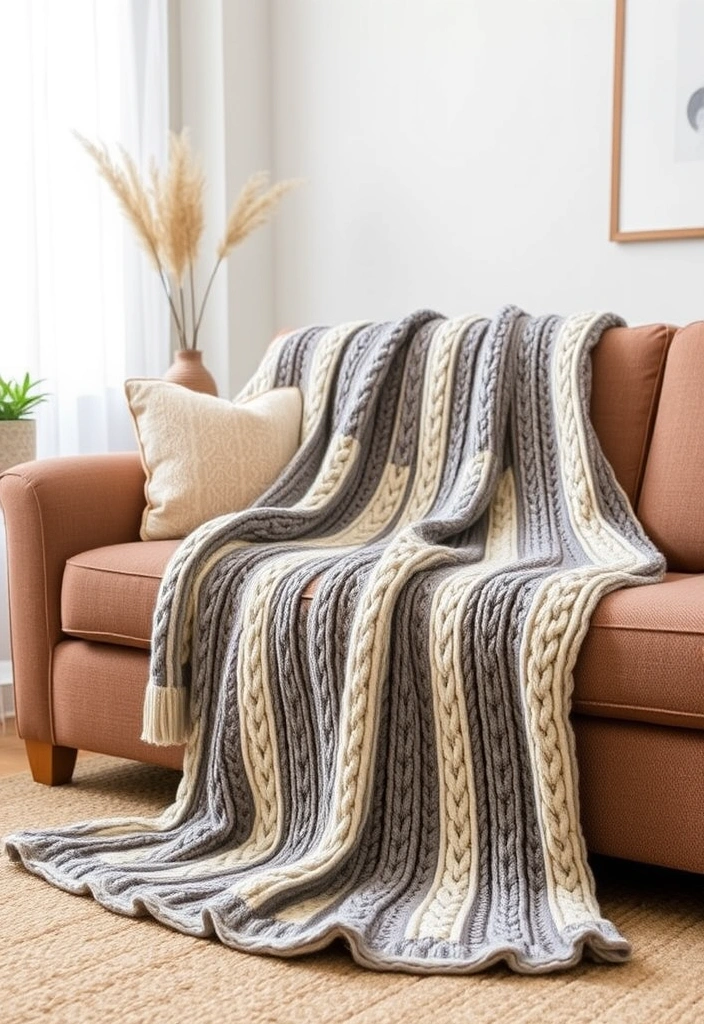
Stay cozy with DIY knitted or crocheted throws that add warmth and texture to your space. There’s a unique joy in creating something with your own hands, and these throws are the perfect blend of functionality and style.
Choosing the right yarn is key to achieving a beautiful finished product. Look for colors that complement your existing decor—think warm neutrals, vibrant tones, or calming pastels. You can even opt for variegated yarn to add a fun pop of color and interest to your throw.
Once you’ve selected your materials, consider the type of stitches you’d like to use. Simple stitches like garter or single crochet are perfect for beginners, while more intricate patterns can provide a satisfying challenge for experienced crafters.
As you work on your throw, keep in mind the size and texture you want to achieve. A larger throw can be great for snuggling up on the couch, while a smaller one might be ideal for draping over a chair or bed. Changing up your stitch pattern can also add depth and character, making each throw a unique piece of art.
This project not only provides comfort but also showcases your crafting skills. Imagine the pride you’ll feel when you wrap yourself in a throw that you made yourself! Plus, it’s an affordable way to refresh your home decor, offering a creative outlet that can be enjoyed alone or with friends.
Invite others to join you in this crafting journey, turning it into a fun gathering where you can share ideas, tips, and laughter. These cozy, handmade throws don’t just elevate your space; they also create a warm atmosphere that makes any room feel like home. So grab your needles or hook, and let your creativity shine!
DIY Decorative Bookends
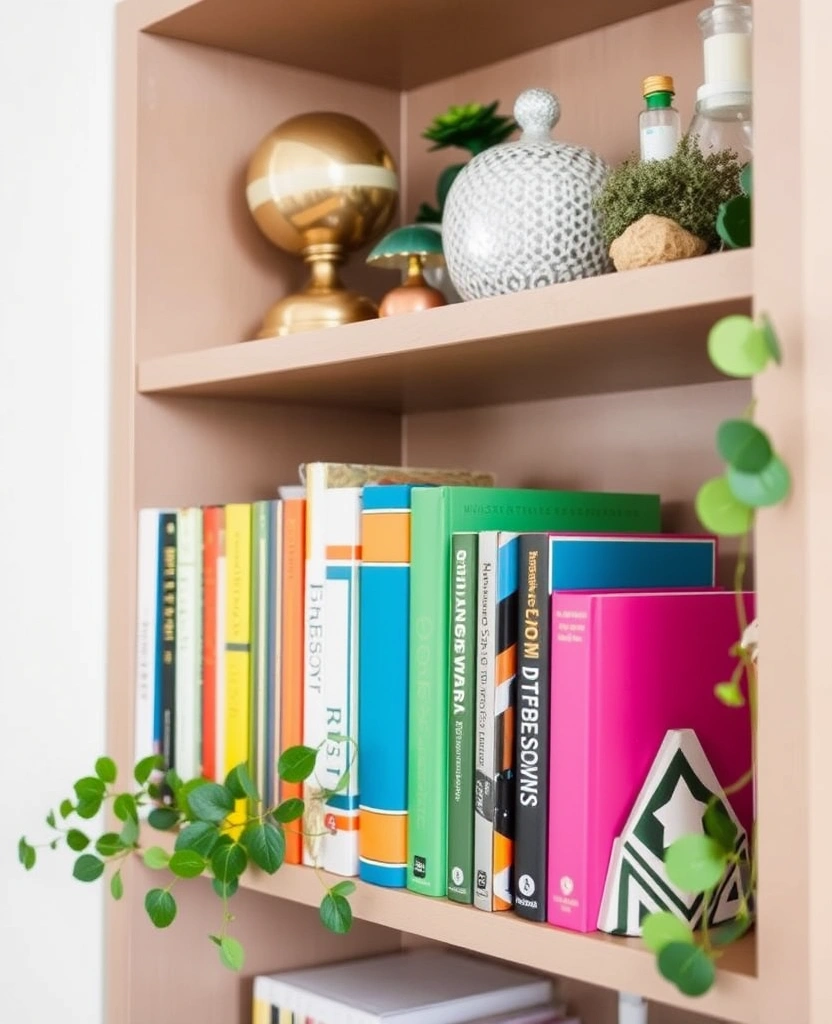
Transform your bookshelf into a stunning focal point with the charm of DIY decorative bookends. Not only do they serve a practical purpose by keeping your beloved books neatly organized, but they also add a splash of personality to your living space.
Imagine crafting bookends that reflect your style, whether it’s sleek and modern, rustic and vintage, or something whimsically eclectic. The best part? You can use a variety of materials, many of which you might already have lying around the house.
Wood is a classic choice for DIY decor, allowing you to carve, paint, or stain your bookends to match your aesthetic. Consider using reclaimed wood for an eco-friendly twist that tells a story. With a little sanding and some creativity, you can create geometric shapes or even whimsical designs like animals or abstract forms.
For those who lean toward the industrial vibe, concrete is an excellent option. It’s surprisingly easy to work with; simply mix, pour into molds, and let it cure. You can paint or seal the concrete once it’s dry to achieve a polished finish. This material not only provides stability but also adds an edgy touch to your decor.
If you’re feeling particularly resourceful, think about upcycling items you no longer use. Old bricks, heavy cans, or even decorative stones can transform into functional bookends with just a little creativity. Wrap them with twine, paint them in bold colors, or decoupage them with beautiful paper to give them new life.
These DIY decorative bookends are not just affordable projects; they’re a wonderful way to express your creativity while enhancing your home decor. They can easily become conversation starters, drawing attention to your curated collection of books and showcasing your unique style.
So gather your materials and unleash your creativity! With just a few simple tools and some imagination, you can craft bookends that are not only functional but also a delightful addition to your home. Your bookshelf will thank you, and your space will feel more personalized and inviting.
Conclusion
Embracing DIY home decor projects is a fulfilling way to personalize your space without overspending.
With these 25 creative and affordable ideas, you can transform any corner of your home into a reflection of your personality and style.
Don’t hesitate to share your projects or ideas in the comments below!